Maintaining Defined Beds & Borders: English-Style Edging is the Secret to Elegantly Dividing Lawn and Garden
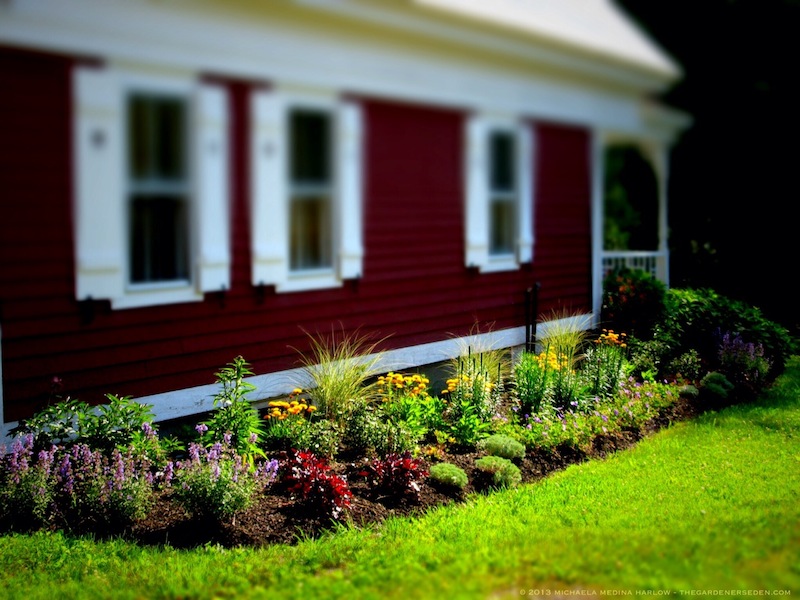  One of my client’s gardens: simple and classic cottage design in springtime with  a crisply edged border and dark, shredded bark mulch
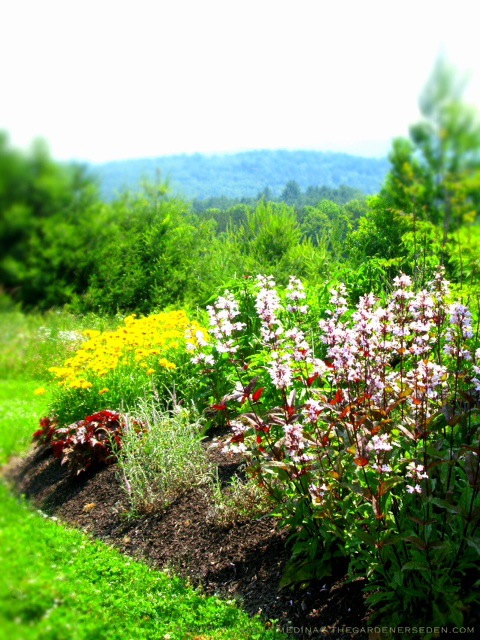
 Later in the season: perennials, herbs and annuals spill casually over the edged border. This garden’s edge holds even with no summer maintenance.
I snapped the top photograph above while working at my long-time gardening client’s weekend home here in Vermont, in late May, just after edging. Every spring I design a new combination of annuals to play in concert with the perennials in this country-casual mixed border. By July, the garden is a riot of orange and deep violet —color plays chosen to please my friend’s preference for a bold, exuberant palette— with sunflowers, verbena, dahlia and cleome exploding like fireworks everywhere. So what keeps a border like this looking neat and tidy all season long? The secret is in the English edge, and a thick layer of weed-supressing mulch…
 Tightly planted perennials and pockets filled with annuals leave little room for weeds. Meanwhile the English edge keeps a clean line between turf and border all season long.
A classic English-style edge is a simple and clean-looking way to define the line between lawn and garden. Although the look is quite precise, English style edging is appropriate in most any garden setting; from formal to country casual. Inexpensive to create and blissfully easy to maintain, I just love the way a sharp edged line brings the bold shapes, colors and textures of a mixed garden border into focus. When designing new gardens in landscapes with sweeping lawns, I often opt for the English edge to maintain distinct, weed-free boundaries between grassy pathways and perennial borders. Crisply cut edges help to keep a garden looking great all season long.
 Using an edging tool to follow curves really brings out the beauty in my client’s one-year-old garden
 Notice how the English edge defines the lefthand curve of the pathway, yet blends with the planted borders. This photo was taken in early autumn, yet the edging on the left held throughout the year with no maintenance.
Large landscaping companies often use mechanical edgers to create deep, sharp-lined trenches between a lawn and garden and then dress these trenches with mulch. Mechanical tools work very well on big projects, but they are quite expensive and consume unnecessary fossil fuels. For home landscapes, I have always used a manual half-moon edger edger and my own elbow grease to create and maintain perennial borders in the English style. It’s great exercise!
 Here’s a photo of a new gardener’s perennial border —which I helped one of my coaching clients to create— cut with a half moon edger.
The line of the garden is measured and, if new, marked out with chalk dust or string. A straight line is then cut (with the half-moon edger or a straight blade spade) through the sod to a depth of about 6 inches. When working a new bed, the sod is then removed from inside the cut line, and compost/loam is added to the planting bed. In a renovation of an older bed, re-establish the line by digging a new trench to a depth of 6 inches. I rock the tool back and forth a bit to create a “v” shape. New mulch is mounded up from the center of the “v” and into the garden bed to create a weed barrier.
 Here’s a close up of the “v” shaped trench and the mounded compost/loam with new perennial plants. This photo was taken before mulching, so you can see both the line and the trench. Nice work on this gardener’s first effort!
Although some gardeners like to fill the trench with aluminum or plastic strip to hold border edges, this isn’t really necessary. With with yearly maintenance and mulch, the earthen edge will hold back weeds on its own.  In my own garden I prefer to keep the earthen trench filled with mulch, and maintain it twice a year with touch ups from the half-moon edger. The first round of edging happens along my lawn/garden borders every spring during April clean-up, just before seasonal mulch (I use well rotted compost mulch mixed with just a bit of dark, natural bark). The second round of edging usually happens in early to mid July, when perennials borders begin to look a bit blowzy and need a bit of deadheading and primping. But twice yearly maintenance isn’t always necessary. In the cottage garden atop the article and the minimalist garden pictured above and below, a crisp edge is cut and mulched along the borders once a year in early spring. In landscapes with lawn and perennial borders, I’m  very fond of English-style edging. This clean but natural look works well with many different garden styles and it’s both inexpensive and easy to maintain.
 Here’s the garden two years later. You can see how the English-style edge blends in naturally with the overall landscape in this contemporary garden; creating a clean, minimalist line.
Article and photographs are copyright Michaela at The Gardener’s Eden, all rights reserved. All content on this site (with noted exceptions) is the property of The Gardener’s Eden and may not be used, reproduced or reposted elsewhere without written consent.
Do you enjoy The Gardener’s Eden? You can help support this site by shopping through affiliate links here (including Amazon.com links). A small percentage of each sale will be paid to this site, helping to cover web hosting and maintenance costs. Thank you so much for your support!


***
4 Replies to “Maintaining Defined Beds & Borders: English-Style Edging is the Secret to Elegantly Dividing Lawn and Garden”
Comments are closed.
I used to use the edger with all of the garden beds when we had a smaller city lot, but out here in the country I have totally wimped out and put in edging. There’s just too much to maintain anymore.. Oh, I feel SO guilty! *sob*
P.S. Lovin’ that stone retaining wall! Is that more of Dan Snow’s work? xo D
@ Deb – Hi there! Just back in from the rain (not much of a week for getting projects started or finished!). Yes, it is a nice retaining wall, isn’t it? Actually, the craftsman is the homeowner, who has a keen interest in stonework and decided to try his hand at completing the design himself. I think he did a fine job! He worked right along side me installing all of the new borders too. Great student!
And, in reply to your first comment: why feel guilty? Whatever works for you is what is right! Installed edging can definitely cut down on labor in larger gardens. ;) xo M
Thank you for posting this helpful technique. I have been wondering how to hold back the weeds in my new flower beds.